Environment spac
- IntelliJ Ultimate 2023.1.2
- Tomcat 10.1.8
- Servlet 6.0
- JSP 3.1
Side Note for checking my Web Server, Servlet, JSP version.(서버, 서블릿, JSP 버전 확인 방법)
Copy and paste in your JSP file and run.(아래 코드를 JSP 페이지에 붙여 넣은 후 실행하면 IE에서 확인가능)
- Server : <%=application.getServerInfo() %>
- Servlet : <%= application.getMajorVersion() %>.<%= application.getMinorVersion() %>
- JSP : <%= JspFactory.getDefaultFactory().getEngineInfo().getSpecificationVersion() %>
Introduct Two way of mapping your servlet files in intelliJ.
1. web.xml 에 직접 Mapping 하는 방법.
기본적으로 Jakarta EE 혹은 Maven 형식으로 프로젝트를 만들었다면 webapp 하위 폴더에 WEB-INF가 있을 텐데 수정해야 할 부분은 web.xml이다.

web.xml 파일을 열면 기본적으로 <web-app> ... </web-app>만 있을 텐데 별도로 안에 <servlet> tag로 mapping 정보를 입력해야 한다.
    <servlet>
        <servlet-name>HelloServlet</servlet-name>  <!--서블릿(java파일) 실제 파일 이름-->
        <servlet-class>com.example.hello.HelloServlet</servlet-class> <!--서블릿 파일이 어디에 있는지 명시. 보통 패키지명 아래-->
    </servlet>

    <servlet-mapping>
        <servlet-name>HelloServlet</servlet-name>
        <url-pattern>/Hello-Servlet</url-pattern>   <!--외부에서 호출할때 어떻게 호출할껀지 명시-->
    </servlet-mapping>
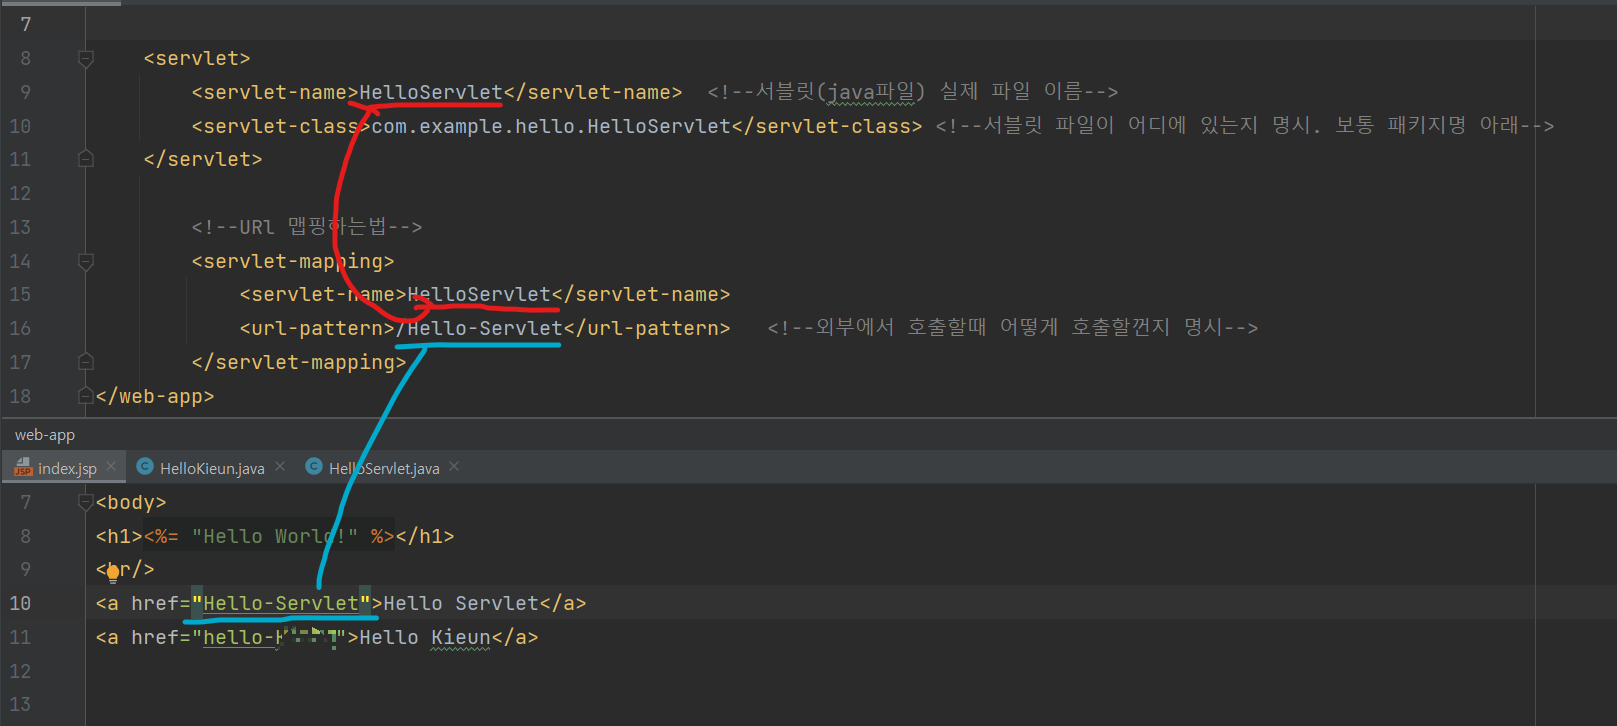
<servlet-name> tag에 명시해야 하는 파일의 이름은 실제 나의 실제 Servlet 파일의 이름을 넣어야 한고
<url-pattern>과 JSP 페이지에서 Servlet을 호출할 때 쓰는 (예를 들면 Form tag 혹은 a tag) 이름은 별명으로 지어주면 된다.
2번째 방법으로 넘어가기 전에 왜 서블릿 파일을 다르게 지어야 할까?라는 ChatBot의 답은 이렇다.
- To make the URL pattern more descriptive. For example, you might use the URL pattern /products to represent a servlet that handles requests for products.
- To make the real servlet file name shorter. For example, you might use the real servlet file name ProductServlet.java to represent a servlet that handles requests for products.
- To avoid conflicts with other servlets. For example, if you have two servlets that handle requests for products, you might use different URL patterns for them to avoid conflicts.
개발자가 실제 생성한 서블릿 파일이 부득이하게 길어질 때가 있는데 외부(즉, 사용자)가 페이지를 호출했을 때 URL에 직관적이게 표시할 수 있다. 예를 들면 실제 서블릿 파일은 MycompanyProductIsGood.java 파일의 서블릿을 누군가 만들었다면 URL Mapping을 하지 않으면 괴상한 이름의 서블릿 파일이 URL에 노출될 수 있기 때문이다.
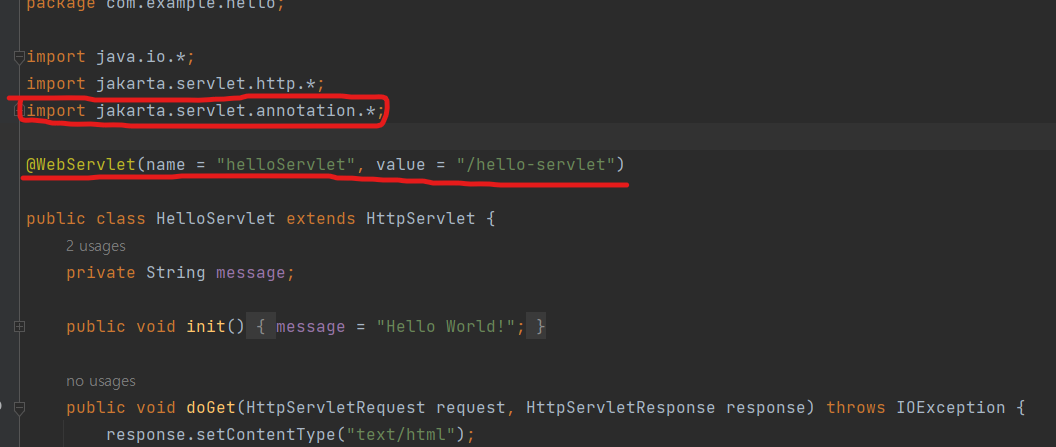
2. Servlet 3.0 이상부터 지원하는 어노테이션(Annotation)을 이용한 방법.
방법은 매우 간단하다.
import 한 줄과 서블릿 클래스 어노테이션 @WebServlet 한 줄을 입력하면 끝.
import jakarta.servlet.annotation.*;

@WebServlet(name = "helloServlet", value = "/hello-servlet")
name에는 실제 서블릿 클래스 이름을 넣고 Value는 1번째 방법에서 설명한 URL Mapping 이름 즉, 사용자에게 노출할 별명을 넣으면 된다.
Hello-Servlet로 URL에 맵핑이 잘 된걸 확인할 수 있다.
